2.13.2013

February & January Sewing Classes

Hello!  I'm terribly late at posting my sewing class schedule for the next month or so -- oops!

I'll be teaching both the Classic Messenger and the Sunburst Sling patterns at Stitchology:

Feb. 13th & Feb. 20th : Classic Messenger
Feb. 26th & March 5th : Sunburst Sling
March 9th : Classic Messenger

Hope to see some of you there!

1.11.2013

it's like a whole bunch of awesome threw up on my wall

Hello all!  I've been slacking in blog-land lately, but I have been busy!

Here's a little sneak peak at what I've been doing lately, from my Instagram:


Ever since hubs and I moved into our rental house this summer, I've been super excited about my first ever dedicated home office & sewing room!  Since the budget is tight and I don't have extra money available to spend on office upgrades, I'm working on prettying up the space using things I already have around the house.  I'll give you the gross before and the much better after pics soon, but for now here's a little taste of what my formerly bare walls are looking like now -- inspiration boards!  Twelve of them, so be exact.  I used this style of cork squares, and by using 50% off coupons at JoAnn's, all twelve were around $15 or so.  Score!  Using magazine clippings, sketches, postcards, paint swatches, and other bits and bobs from around the office, I was able to turn these squares into twelve mini inspiration boards that double as colorful art for my space. Now, walking into my sewing space puts me in a creative mindset, and it is SO much better than my formerly bare, white walls.

Stay tuned for more progress photos as I complete this space!


12.09.2012

DIY handmade Christmas ornament: Christmas Tree!

For last week's Modern Quilt Guild meeting, we had a handmade Christmas ornament exchange.  I put mine together at the last minute in about 20 minutes the night before with scraps from my sewing stash.  It's a double sided scrappy Christmas tree! It was a super easy project, and I'm happy with the way it turned out... here are some basic steps (sorry, no photos - I was in a rush to get it finished!):


1. Cut out triangles for the tree.  I cut out 3 green triangles for the front, and 3 orange triangles for the back.  I just eyeballed the green set, and then made the orange set match in size.  I also cut out two little brown scraps for the tree trunk.

 2. Arrange the triangles and tree trunk of each side and fuse it all at the same time to fusible fleece.

3.  With the wrong sides together, zig zag around each triangle and the tree trunk.  I also inserted the ends of a bit of ribbon I had lying around into the top point of the tree.

Voila! 

show & tell: bags from sewing classes!

I've had a few sewing classes over at Stitchology this fall, and a blog post is due!  I love seeing what the students in the class create and what fabrics they choose.  It's amazing how different the same bag can look with different fabrics!

Here a few photos from a Zippy Bag class and a Sunburst Sling class:


9.23.2012

Easy Kimono Dress from Pattern Runway

I just finished sewing up a new dress!  I chose the Easy Kimono Dress from Pattern Runway after searching around on Etsy, and I love that I'm supporting another independent pattern designer. 

Overall, I love this dress! I found a fun, silky print to sew it with, and I'm super happy with how it turned out.   It will pretty much match everything, and I can dress it up or down. I chose to sew it in a size medium, and apparently I underestimated the girth of my hips... cause it's a bit more snug down there than I would have liked.  It definitely won't influence how much I think I'll be wearing this dress since I just love it! I already have some fabric lined up to sew another dress, and I'll probably make the skirt portion just a wee bit larger.  

This dress took me 3 evenings to create, and the hardest part by far was cutting out the pieces because the fabric kept wanting to shift around! I haven't sewn with silky fabric like this before, but I used a new microtex sharp needle (size 70/10), pinned liberally, and it went just swimmingly.  It was hard to press, since the fabric didn't really want to crease.  I suppose that's good news, so I won't have to deal with wrinkles when I wear it!


9.16.2012

tutorial: DIY fabric marker board / white board

Today I have an easy-peasy marker board tutorial to share!  This idea came about after I decided that I wanted a marker board in my office.  Well, a quick trip to Staples showed me that this was pretty much my only option (especially in my price range, which was like $3). I went ahead and took the liberty of adding my own flourishes to this photo.


This option just wasn't going to fly, and considering the previously mentioned budget, I decided upon an alternative.  Surprise!  This literally did cost me $3, and looks so SO much nicer than other commercially available marker boards.  In fact, I could just use it as artwork if for some reason I don't have anything to do.  Which is never.  So I'll keep it as a marker board.

I decided to use a piece of fabric that I designed and had printed at Spoonflower, so it's nice to display it in my creative space!


Supplies:
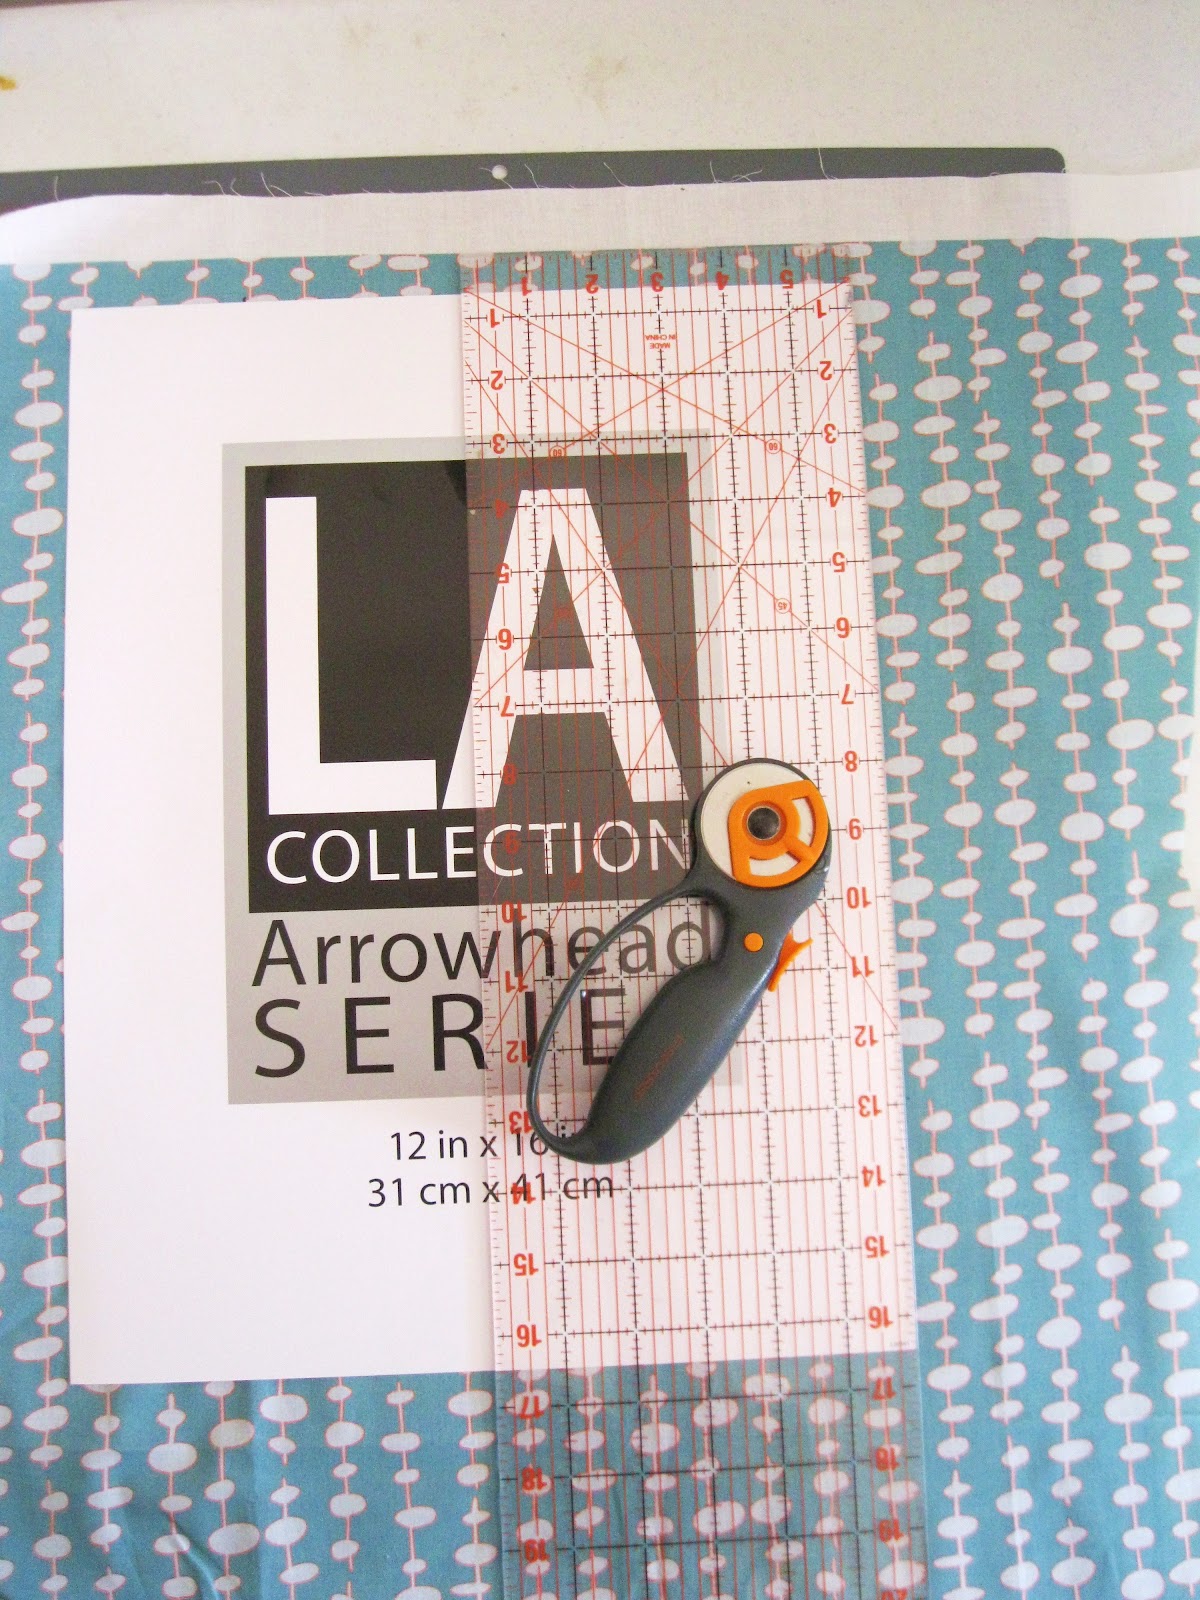
- thrift store or purchased frame (mine is a 12"x16" frame)
- fabric scrap
- spray mount adhesive (I've used Scotch and 3M brands with equal success)
- rotary cutter, ruler, and cutting mat (or scissors)


1. First, I pressed the fabric.  Then I removed the backing of the frame and used the paper insert as a guide so I knew what size fabric piece I should cut.  My rotary cutter and mat were nice tools to have, but obviously this could be done with regular fabric scissors.


 2. Spray the adhesive onto the particle board backer that comes with the frame.  Double sided tape could also work nicely if you don't have spray mount on hand.


3.  Pop the backer into the frame and hang on your wall!  I used those velcro 3M strips on my frame so that the frame doesn't wobble around while I'm trying to write on it.  Voila!  Done!


pleated tote photos

I thought I'd share some pictures of bags that I stumbled upon on Aimee's blog! The pattern featured is my Pleated Tote pattern.

She did such a great job mixing and matching fabrics, and I'm so impressed that she's already sewn 10 of this bag!  I think my favorite is the green one :)